open notepad and paste the following
net stop spooler
del %systemroot%\system32\spool\printers\*.shd
del %systemroot%\system32\spool\printers\*.spl
net start spooler
save it as c:\delprintjobs.cmd
and run it … TADA …. jobs are gone..
open notepad and paste the following
net stop spooler
del %systemroot%\system32\spool\printers\*.shd
del %systemroot%\system32\spool\printers\*.spl
net start spooler
save it as c:\delprintjobs.cmd
and run it … TADA …. jobs are gone..
The five FSMO roles are:
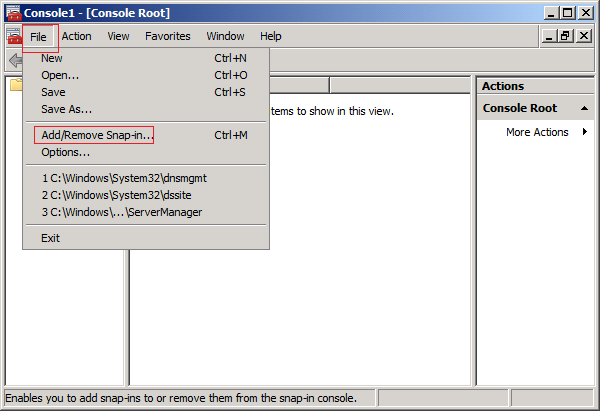
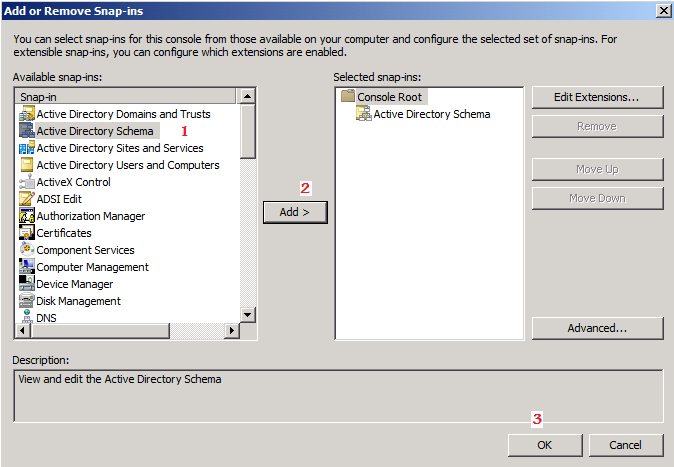
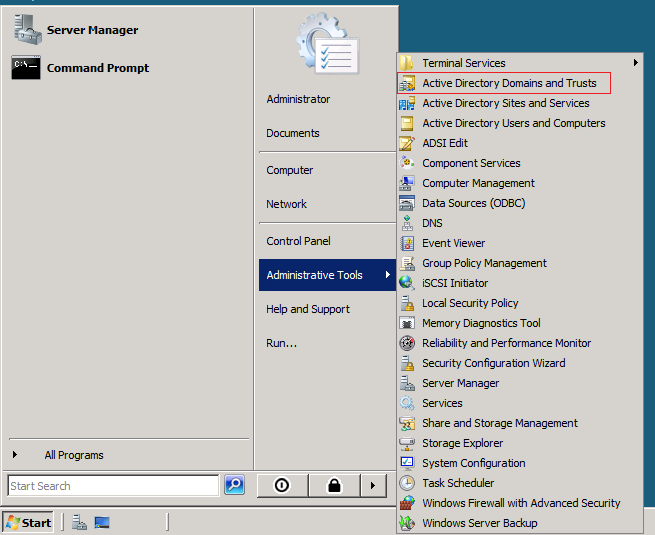
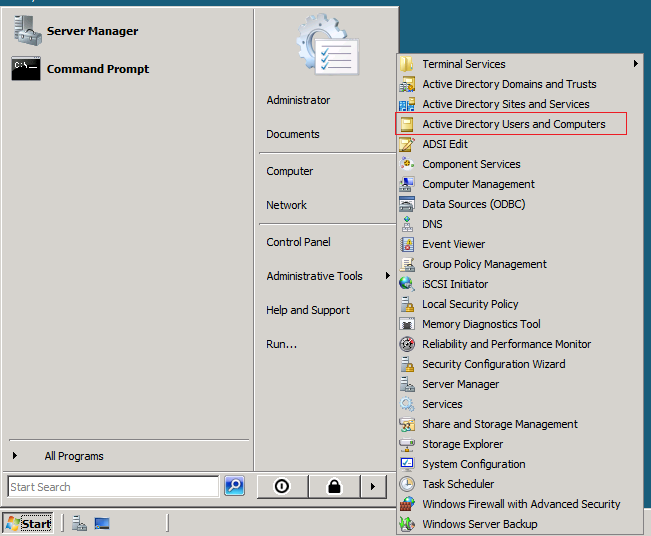
The FSMO roles are going to be transferred, using the following three MMC snap-ins :
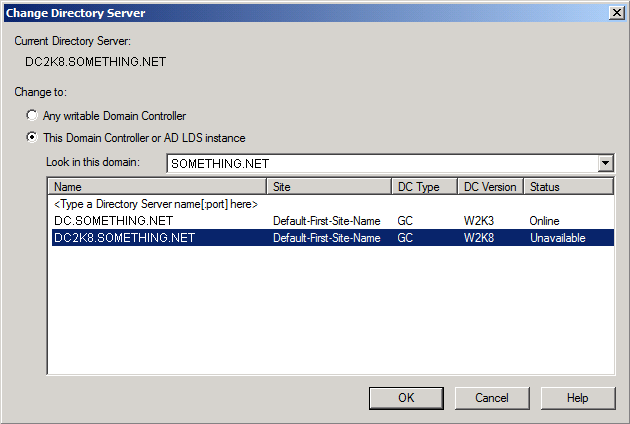
Note: The following steps are done on the Windows Server 2008 machine that I intend to set as the roles holder ( transfer the roles to it )
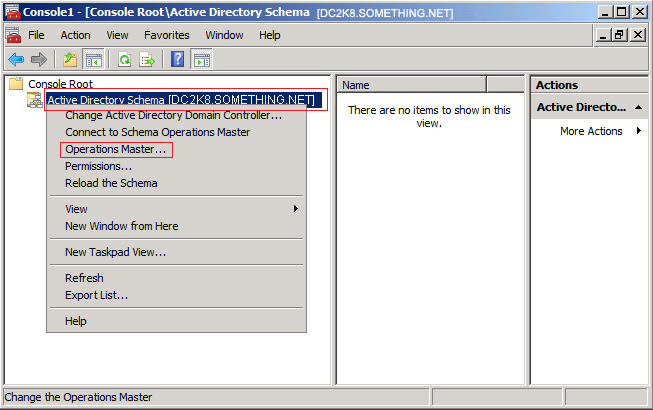
Lets start transferring the FSMO roles.
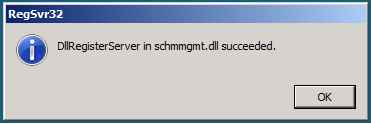 A popup message will confirm that schmmgmt.dll was successfully registered. Click OK
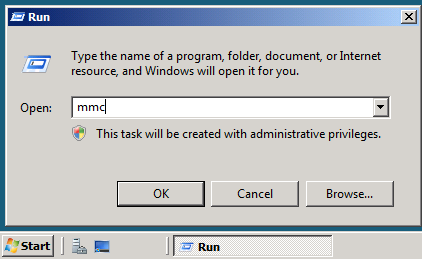
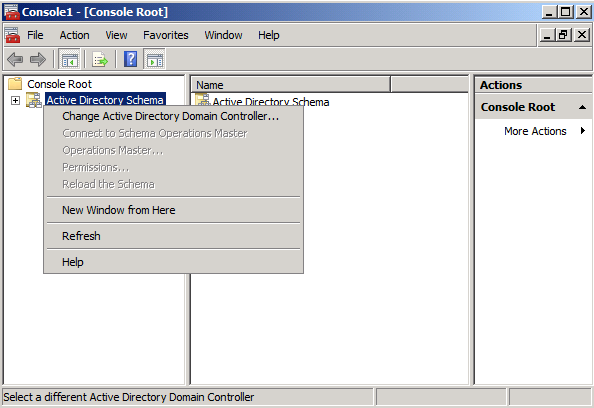
 You will receive a message box stating that the schema snap-in is not connected to a schema operations master. That is for sure, as we have not yet set this Windows Server 2008 domain controller as a Schema Master role holder. This will be done in the next step. Click OK
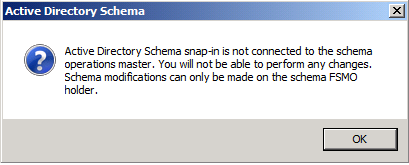
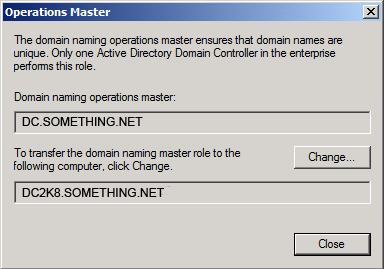
 Click Yesto confirm the role transfer
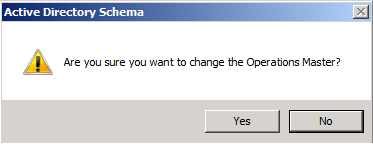
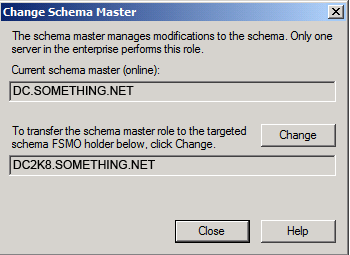
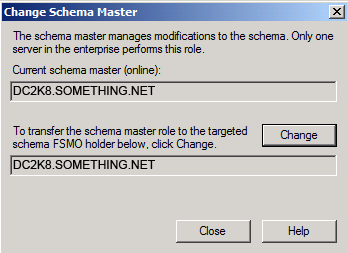
The role will be transferred and a confirmation message will be displayed. Click OK
![]()
Then click Close, as you can see in the below snapshot, the current schema master is DC2K8.SOMETHING.NET
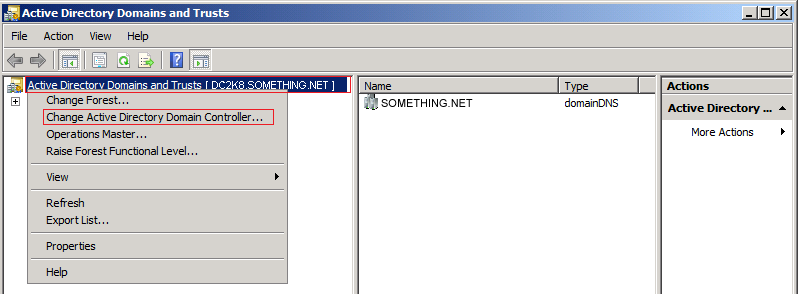

 Click YES to confirm the transfer of the Domain Naming role
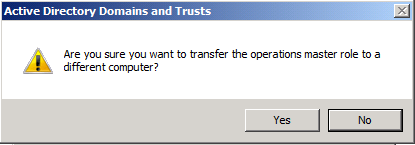 The role will be transferred and a confirmation message will be displayed. Click OK , then click Close
 ![]()
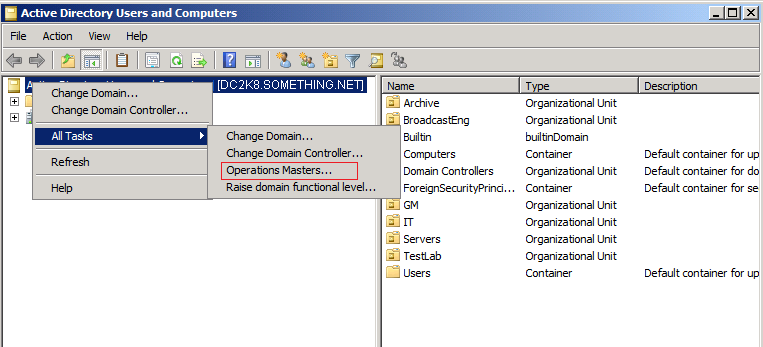
Till now, we have successfully transferred two FSMO roles, the Schema Master role and the Domain Naming role. The last three roles can be transferred using a single Snap-in.
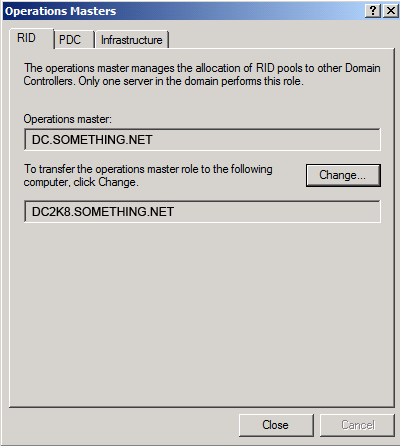 Click Yes to confirm the role transfer
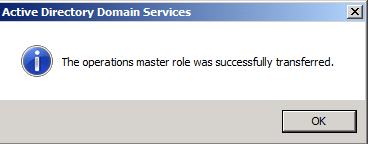 As for the Infrastructure role, once you click on the Change button you will receive the below message
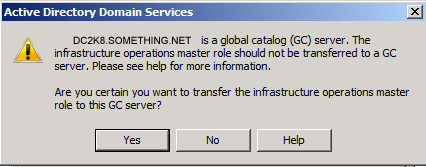
By default, when you first install your first Domain Controller, it holds the five roles and beside that it is a Global Catalog. If your environment is a multi-domain/forest, then you should think about structuring your FSMO roles and transfer the Infrastructure role to a none Global Catalog domain controller. Else if you have small number of domain controllers ( ex. two domain controllers) then you should not worry about this. ClickYes
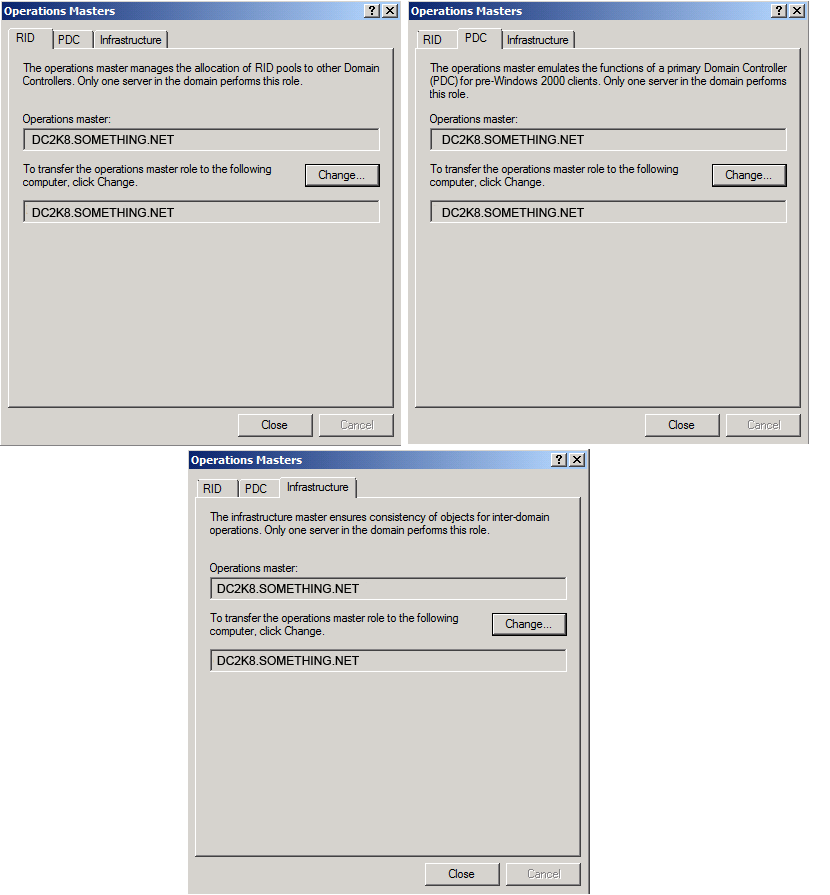
That’s it, by now, you have successfully transferred the five FSMO roles to the Windows Server 2008 Domain Controller.
Summary
There are five FSMO roles in a forest, to transfer any of these roles you have to use the appropriate Active Directory snap-in.
What a mess! Spent nearly a full day trying to remedy the 1720 install error. Tech support was no help at all and I must have tried a half-dozen different online suggestions. In the end, it was just a matter of removing the VM drivers through Add/Remove and deleting the Novatel directory in my Program Files. Deleting the directory was the key

So you’ve gotten a new iPhone on Verizon’s network. Mazel tov. For those new to the iPhone ecosystem, you may want to check out our many guides to the various apps available for your new smartphone.
We have dueling iPhone app choices from technology columnist David Pogue and App Smart columnist Bob Tedeschi’s favorite apps, picks from former tech reporter and longtime Apple watcher John Markoff and selections from media columnist David Carr.
Check back often, as our Apps Index is continually updated with apps coverage from all corners of nytimes.com.
For example, Mr. Tedeschi likes:
SOUNDHOUND (FREE AND $5) You’ve probably heard of Shazam, the app that identifies songs. SoundHound is faster, and it offers a broader range of ancillary features. You can hum a tune into the phone and it’ll find the song, look up lyrics and run YouTube videos of song performances. The $5 version lets you identify an unlimited number of songs. Users of the free version get five tags monthly.
HIPSTAMATIC ($2) Scores of photography titles are in the App Store. Many are terrific, but not one matches Hipstamatic’s blend of simplicity, serendipity and art. At heart, the app is a filter that will unpredictably saturate, blur or discolor your images, among other things. The results are always surprising and often stunning. Add packs of lenses and film effects for $1 apiece.
EVERNOTE (FREE) The company advertises this as a personal digital assistant, and it’s an apt description. Evernote is a traveling notepad that synchronizes with desktop and browser software (also free). Use your iPhone to copy an image, take a photo, record a voice memo or jot down a note, and it appears on your computer (and vice versa). It also recognizes your written text, within limits. The free version stores a fair amount of information, but for $45 a year, you needn’t sweat the data limits.
ANGRY BIRDS ($1) A runaway favorite among the iPhone crowd, the app tests your ability to break down the barricades that protect green pigs. The weapon: flightless birds, launched by catapult. No wonder they’re angry. The game is easy to learn, yet challenging to play, with witty touches throughout. You can try a limited free version, but if you do, good luck resisting the paid version, with more than 800 possible scenes.
When importing a new certificate into Exchange 2007/2010, you might encounter a certificate error in Outlook 2003/2007/2010. I have included a screenshot of the error I encountered with Outlook 2007 :

When you choose the View Certificate button, it brings up another window that shows you what certificate is in error. In this case, the certificate name is “mail.something.net.”
So the million dollar question? Why the error?
Well, when we install a new certificate, there are a few tasks we want to do. Obviously, we install the certificate for a purpose. This purpose is till allow us to use Exchange services securely. So how do we enable Exchange to use these services? If you are planning to do a very simple configuration and do not care about external Autodiscover access, you do not need to use a Unified Communication Certificate.
So let’s say we have a simple regular common certificate. A certificate with a Common Name (CN) of mail.something.net We install this certificate onto our Exchange box with its’ private key. In our case we were migrating so we did not have to request a certificate via IIS. We just exported it with its’ private key and imported onto the new box. We then assigned this certificate to IIS. Now I went to the Exchange Management Shell and enabled Exchange services to use this certificate. In order to do this, you must run the following commands:
Get-ExchangeCertificate
Thumbprint Services Subject
———- ——– ——-
BCF9F2C3D245E2588AB5895C37D8D914503D162E9 SIP.W CN=mail.something.net.com
What I did was go ahead and enable all new services to use every available service by using the following command:
Enable-exchangecertificate -services IMAP, POP, UM, IIS, SMTP –Thumbprint BCF9F2C3D245E2588AB5895C37D8D914503D162E9
The next step would be to ensure the AutodiscoverInternalURI is pointed to the CAS that will be your primary CAS for Autodiscover servicing.
Get-ClientAccessServer -Identity CASServer | FL
AutoDiscoverServiceInternalUri : https://casnetbiosname/Autodiscover/Autodiscover.xml
See the issue here? We are not using a UC certificate that contains the names, “casnetbiosname, casnetbiosname.shudnow.net, mail.something.net, and autodiscover.something.net” Since the Autodiscover directory in IIS will be requring SSL encryption, the url specified in the AutoDiscoverServiceInternalURI must match what is specified in your certificate. You must also ensure there is a DNS record that allows mail.shudnow.net to resolve to your CAS. We should re-configure the AutoDiscoverServiceInternalURI by using the following command:
Set-ClientAccessServer -Identity CASServer -AutoDiscoverServiceInternalUrihttps://mail.something.net/Autodiscover/Autodiscover.xml
We now need to go configure all the InternalURLs for each web distributed service. If you are going to be utilizing the Autodiscover service from the outside or for non-domain joined clients, you may want to configure an -ExternalURL in addition to your -InternalURL.
Here is the reason why we were receiving the certificate errors. Your InternalURLs most likely are not using mail.shudnow.net. Your InternalURLs are most likely pointed to something such as https://casnetbiosname/ServiceURL which will fail since this is not the CN of your simple certificate.
You can run the following commands to fix your internalURLs so your Outlook 2007 client can successfully take advantage of your web distribution services.
Set-WebServicesVirtualDirectory -Identity “CASServer\EWS (Default Web Site)” -InternalURL https://mail.something.net/EWS/Exchange.asmx -BasicAuthentication:$true
Set-OABVirtualDirectory -Identity “CASServer\OAB (Default Web Site)” -InternalURL https://mail.something.net/OAB
Note: You must ensure that you enable SSL on the OAB directory in IIS which is not on by default. The above command will only enable SSL, but will not ensure 128-bit SSL is required.
Enable-OutlookAnywhere -Server CASServer -ExternalHostname “mail.something.net” -ClientAuthenticationMethod “Basic”-SSLOffloading:$False
Note: The above Enable-OutlookAnywhere command works on SP1. For RTM, substitute -ClientAuthenticationMethod with -ExternalAuthenticationMethod.
Set-ActiveSyncVirtualDirectory -Identity “CASServer\Microsoft-Server-ActiveSync (Default Web Site)” -ExternalURL https://mail.something.net/Microsoft-Server-Activesync
Set-UMVirtualDirectory -Identity “CASServer\UnifiedMessaging (Default Web Site)” –InternalURL https://mail.something.net/UnifiedMessaging/Service.asmx -BasicAuthentication:$true
Note: The above Set-UMVirtualDirectory command is not needed in Exchange 2010. Exchange 2010 no longer contains a UnifiedMessaging virtual directory and instead uses the Web Services Virtual Directory.
Resetting the Trend Micro Client/Server for SMB & Worry-Free Business Security password:
That should allow you to login, once you are logged in don’t forget to change the password to something more secure!
Here’s a little time-saving tip for working with mailboxes in Exchange 2010. Normally if you need full access to another user’s mailbox in Exchange 2007/2010 you would highlight their mailbox in the Exchange Management Console and the choose “Manage Full Access…” from the action pane. You would have to do this individually for each mailbox that you wanted to manage full access permissions for.

Here’s an easier way to grant full access to a user for every mailbox in a mailbox database. Just edit the bracketed fields below and paste the cmdlet in the Exchange Command Shell:
Get-MailboxDatabase -identity “[mailbox database name]” | Add-ADPermission -user [username] -AccessRights GenericAll
Voila! You now have full access to all mailboxes in the selected database. This even applies to new accounts created after you run the cmdlet.
If you have been the target of an NDR attack* attempt or made an error when configuring your Exchange server and have left yourself an open relay, then you may find that your queues on the Exchange server have a large number of invalid email messages.
* An NDR Attack is where messages are sent to your server with an invalid email address on purpose. Your server then attempts to bounce them back to the sender. The only problem is that the sender has been spoofed and it is that address that is the intended target of the message. These attacks can be avoided with Exchange 2003 and Windows 2003 Service Pack 1 and higher using a new option.Other symptoms include hard disk space is dropping rapidly and the server has become unresponsive. The Exchange logs are much larger than normal.
This article is based on the MS KB 324958 which was written for Small Business Server and MSKB 909005 which is for the full version of Exchange. Some of the techniques have been adjusted based on our experience with following the guides. Original articles:
http://support.microsoft.com/default.aspx?kbid=324958
http://support.microsoft.com/default.aspx?kbid=909005
Before you start cleaning up the server, you need to find the source of the problem and deal with it.
Check Whether the Exchange Server is an Open SMTP Relay using a Telnet Test
A Telnet test involves establishing a Telnet session from a computer that is not located on the local network to the external (public) IP address of the Exchange server. You need to carry out the test from a machine at home, or from another office. Doing the test from a machine on your own network will produce useless results.
set localecho
(minus quotes) and press enter. This lets you see what is going on.
open 111.222.333.444 25
where 111.222.333.444 is your Exchange server’s external IP address
220 mail.server.domain Microsoft ESMTP MAIL Service, Version: 6.0.2790.0 Ready at
ehlo testdomain.com
and press enter (note “testdomain.com” can be anything that isn’t a domain that the Exchange server is responsible for.
250 OK
mail from:address@testdomain.com
and press enter (again where address@testdomain is an email address that is not on the Exchange server. Note the lack of space between from and the first part of the address).
250 2.1.0 address@testdomain.com….Sender OK
rcpt to:address@anotherdomain.com
and then press enter (where address@anotherdomain.com is not either an address you use internally or the address you entered earlier as the from. Once again note the lack of space between to and the first part of the e-mail address).
550 5.7.1 Unable to relay for address@anotherdomain.com
then you are relay secure.
However if you get
250 2.1.5 address@anotherdomain.com
Then you are an open relay.
What now?
There are two parts of the Exchange that can make your Exchange server an open relay, the Default SMTP Virtual Server and SMTP connectors. You need to check both to ensure that you haven’t configured them wrongly and turned your machine in to a spammers target.
Default SMTP Virtual Server
To check or correct the configuration of the Default SMTP Virtual Server:
SMTP Connections
Once you have made the changes, restart the SMTP server service and then repeat the telnet test above to ensure that you have closed everything.
This technique requires the Windows Event Viewer to determine whether a user is trying to use the SMTP service in Exchange to send email. If you have disabled the authenticated user option already then this isn’t an issue.
You now need to watch the Event Logs on the Exchange server. In the application log you will see something similar to the following which can indicate that a user is trying to send email through the SMTP interface.
Event Type: Information
Event Source: MSExchangeTransport
Event Category: SMTP Protocol
Event ID: 1708
Date: 30/08/2004
Time: 15:45:08
User: N/A
Computer: EXCH-SRV1
Description: SMTP Authentication was performed successfully with client test-pc1. The authentication method was LOGIN and the username was domain\username.
If the account being used is “Guest” then you need to disable the Guest account.
If it is another account then you need to either change the password or disable the account.
Ideally you do not want any kind of relaying going on. The best option if this is happening is to disable the feature altogether. If this isn’t practical for business reasons, then you need to secure it as best you can.
The Administrator Account is the most common target
Note that the most common account that is used for this type of attack is the Administrator account. Therefore if you suspect that that the administrator account is being abused, then change its password and restart the SMTP Server Service to ensure that the new credentials are used. The administrator account is attacked because it doesn’t lock out.
If you are under an NDR attack, then you will find lots of messages in the queues of the server. These messages have special characteristics which make them easy to spot.
Note: If you are using an SMTP Connector to route email through your ISP using a smart host, then you cannot detect this type of attack. The messages are sent straight out to the ISP by your server. If your ISP has alerted you that there may be a problem, you will need to use message tracking and the SMTP log to detect the cause of the attack.
If you are on Exchange 2003 with Windows 2003 then you can stop an NDR attack by using recipient filtering and the tar pit option in Windows 2003. You will still need to clean the queues using the techniques outlined, but it will stop further traffic.
If you are on Exchange 2003 on Windows 2000 then you should NOT enable recipient filtering as this exposes your server to a directory harvest attack.
Exchange 2000 users do not have any kind of recipient filtering options available to them.
Therefore you should look at a third party tool that can do the filtering for you, often referred to as an LDAP lookup. Vamsoft ORF has Active Directory filtering and has a 30 day trial version.
Once you have found out the cause of the problem and dealt with it, then you need to clean up the server.
Block port 25 on your firewall/router so that SMTP traffic is not coming in while you cleaning the server. This stops new messages, both spam and valid messages and also ensures that nothing you want is lost while you clean up the server. As long as you do not leave the port closed for longer than 48 hours then genuine inbound email will still be delivered.
When following this procedure you should note that it can take NUMEROUS ATTEMPTS OVER MANY HOURS before the queues are clear. Exchange System Manager is notorious for being unable to show the true extent of the queues when it has been abused in this way, so messages can continue to appear even after you think you have cleaned the queues.
Cleaning Up the Exchange Server’s SMTP Queues
Warning: This process will delete all email that is due to go to external recipients. Internal messages are not affected, neither are new inbound messages from the Internet unless they are from the spammer continuing to try and abuse your server.
Capturing the Messages Into a Single Queue
This process requires an SMTP connector for all addresses. If you don’t already have one (with a * on the namespace tab) then you need to create one using the instructions below.
If you already have an SMTP Connector with a * on the namespace tab, then you can use it for this process. You will need to adjust the settings as appropriate. You may wish to just make a note of the settings, delete the connector and create a new one for this process. When complete recreate your live connector.
The Exchange SMTP virtual server is now processing all the messages and placing them in to a single queue for your SMTP connector. This can take some time. You may want to wait until the number of messages in the queue stays constant before attempting the next stage.
Exchange 2000: The queues can be found in Servers, <your server>, Protocols, SMTP.
Exchange 2003: The queues can be found in Servers, <your server>, Queues.
You may also find the Servers listed under an administrative group.
To locate the required queue, look for a small red clock on the yellow icon. This indicates that it is on a timed delivery.
Deleting the Messages
Now that the messages are in one queue, it is quite easy to delete them
Exchange 2003
Exchange 2000
Once the messages have been deleted, which could take some time, refresh the queues to ensure that they don’t continue to build. If they do then Exchange is still processing the messages. You will need to repeat the procedure to delete more messages until the queues are completely clear and stay at zero.
Once you have flushed out the messages, undo the changes that you have made.
If it was a new SMTP connector, delete it.
If you adjusted an existing connector, put the settings back how they were. Don’t forget the time on the “Delivery Options” tab. it should be “Always Run”.
Finally restart SMTP virtual server to get Exchange to start using the new settings.
If you closed port 25 during this process, then remember to open it up again.
Alternative Queue Clean Up Method
If you have a very large number of messages, then there is a command line tool that you can get from Microsoft.
ftp://ftp.microsoft.com/pss/Tools/
Then go in to the folders: Exchange Support Tools / Aqadmcli
(Due to the use of spaces in the folder names, a direct link isn’t possible)
After downloading the utility use the following command to clear all the queues.
aqadmcli delmsg flags=all
Messages that have been stuck in the queue but cannot deliver will usually end up in the “badmail” folder. This folder can take up a lot of space. You should remove the content of this folder to free up some valuable space.
Exchange 2003 SP1 and higher does not use the Badmail folder unless you specifically enable it via registry hack.
There are various techniques for dealing with the badmail folder. This blog posting outlines a useful script that you can use to do it for you:http://hellomate.typepad.com/exchange/2003/07/dealing_with_ba.html
If you were an open relay then you may have ended up on some of the blacklists. When the message bounces back you will get a reason code which should include which blacklist has rejected you.
To get off the blacklist you will have to find their web site and follow their procedure.
As a short term measure, setup an SMTP connector to send all your email via your ISPs SMTP server.
Using Email Blacklists (Exchange 2003 ONLY)
If you want to use an Email Blacklist yourself, then you will need to setup filtering. This article at MS tells you how:
http://support.microsoft.com/default.aspx?kbid=823866
Those of you using an older version of Exchange will have to use a third party tool – whether this is commercial or open source. Vamsoft’s ORF has blacklist support.
This tip creates ISO images from DMG images, so they can be burned elsewhere. To convert the file to an ISO image, type the following command at your terminal window:
hdiutil convert /path/to/filename.dmg -format UDTO -o /path/to/savefile.iso
Replace /path/to/filename.dmg with the path and name of the existing .DMG file, and replace /path/to/savefile.iso with the desired path and name for the converted image.
These are instructions on how to make a duplicate copy of CD or DVD using Mac OS X Leopard Disk Utility.
Step One
Launch Disk Utility from Applications:Utilities and select your CD from the list on the left.


Step Two
Click the New Image button to create a dmg of your CD or DVD.

Step Three
Enter a name and location to save your image as then click the Create button.

Step Four
Disk Utility will now create your new disk image.
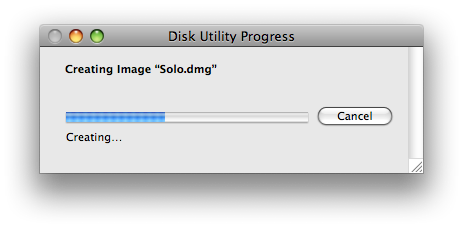
Step Five
Once done you will notice that your disk image will appear on the left hand side of the Disk Utility window. (ie Solo.dmg).

Step Six
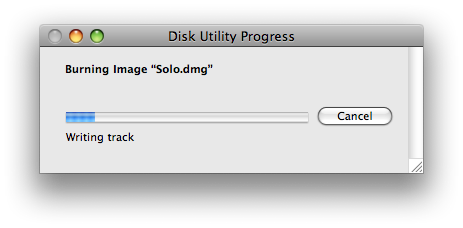
Select the dmg from the left side of the Disk Utility menu then click the Burn button.
![]()
Step Seven
Your original CD or DVD will then be ejected and Disk Utility will indicate that it is waiting for a blank CD or DVD.

Step Eight
Insert a blank CD or DVD then click the Burn button.

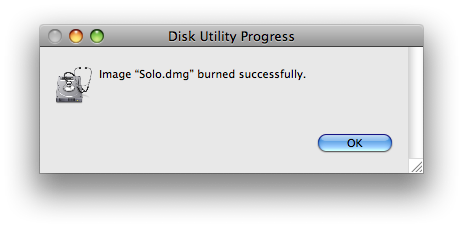
Step Nine
Once the burning has completed you will notified that it was successful. Click the OK button to finish the process.